Showing posts with label pink. Show all posts

Sunday, January 31, 2021

January sewing

 So this year I signed up for the 52 week sewing challenge on Facebook. I've made it to week 4 ok, I'm not sure I'll be able to do all the challenges as I find myself thinking of new things I could do to meet the challenge instead of making things from my to-do list!

Week 1

Week 1 was "organise your sewing space", as I'm currently using the kitchen table for sewing, I organised my storage space instead and I went through and catalogued my fabric into albums on my phone so I can plan things without pulling everything out constantly. It was also annoying me that all my cotton thread was stored upstairs in my sewing box, so I found a tin to keep it in instead so I could bring it all up and down instead.


Week 2

Week 2 was "complete a work in progress/unfinished project". I had started making myself a tshirt and got really annoyed with the neckband after I had done it wrong twice, so I sat down and finished that off. It's still not perfect (the neckband should be ribbing really and I don't have any, so I used jersey which isn't really stretchy enough) but I will wear it anyway because I like the main fabric. And maybe one day I'll re-do the neck. (Pattern is Slim Fit Raglan from Patterns for Pirates, fabric is from Fabricasa but looks like they've sold out of that design)


Week 3

Week 3 was "make up a pattern you own that you've never made". Now I have several that fit that description, but in the end I decided to make up HallÄ Patterns Twirly Skirt. It's a simple circle skirt so doesn't really need a pattern, but hey it's a free pattern and I don't have an easy way to draw a circle that big. Also it has pockets! Love pockets. I made it from some modal fabric that I'd acquired - mainly because I seem to buy 1m lengths of most things so I didn't have many pieces big enough - the modal feels nice to wear but it was very stretchy so a little difficult to work with especially on the hem.


Week 4

Week 4 was "make something for your head or feet" well I had promised a while ago to make a birthday crown for my friend's little girl so I did that. It's the same as the Christmas crowns I made, Crowning Glory from Made by Jack's Mum.


I also seem to be doing a "make all the cuddly toys" challenge with my toddler. I got a lovely panel from Bugweed's Fabrics and Crafts with easy cut and sew cuddly toys, and we've been making some of those up. She also requested an orange dinosaur, which we drafted from a picture in her dinosaur book, and soon it will be her friend's birthday so we made a pink bear using the free Plushie Pals pattern from Patterns for Pirates. (free patterns may be a theme - I do buy patterns but the free ones seem to be easier!)

Wednesday, February 1, 2012

Quilting: Shoo-fly - 1/2/12

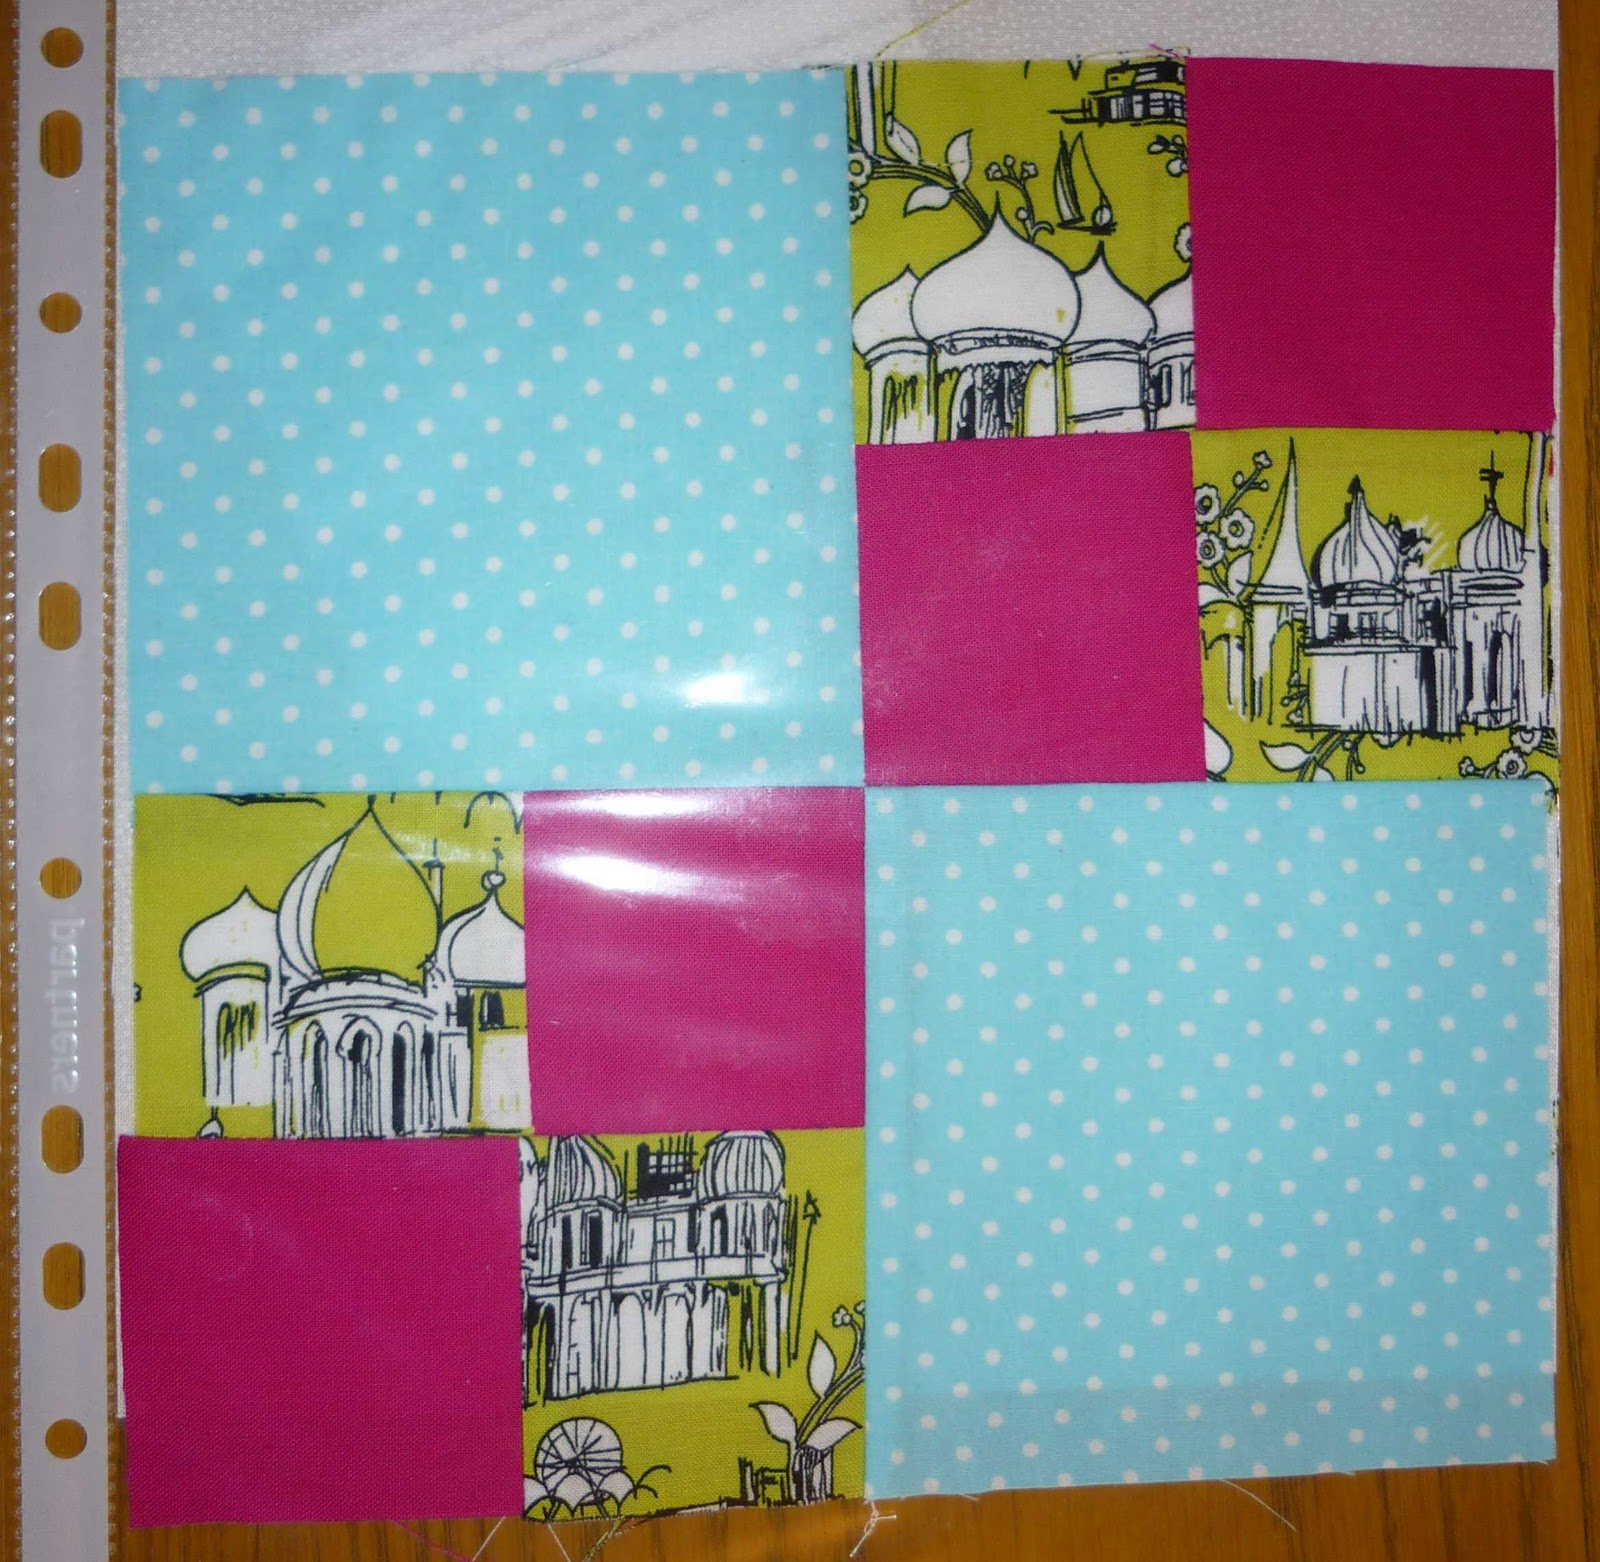
This block is called the shoo-fly block (named after a shoo fly pie, though I don't see how it looks like that at all!)
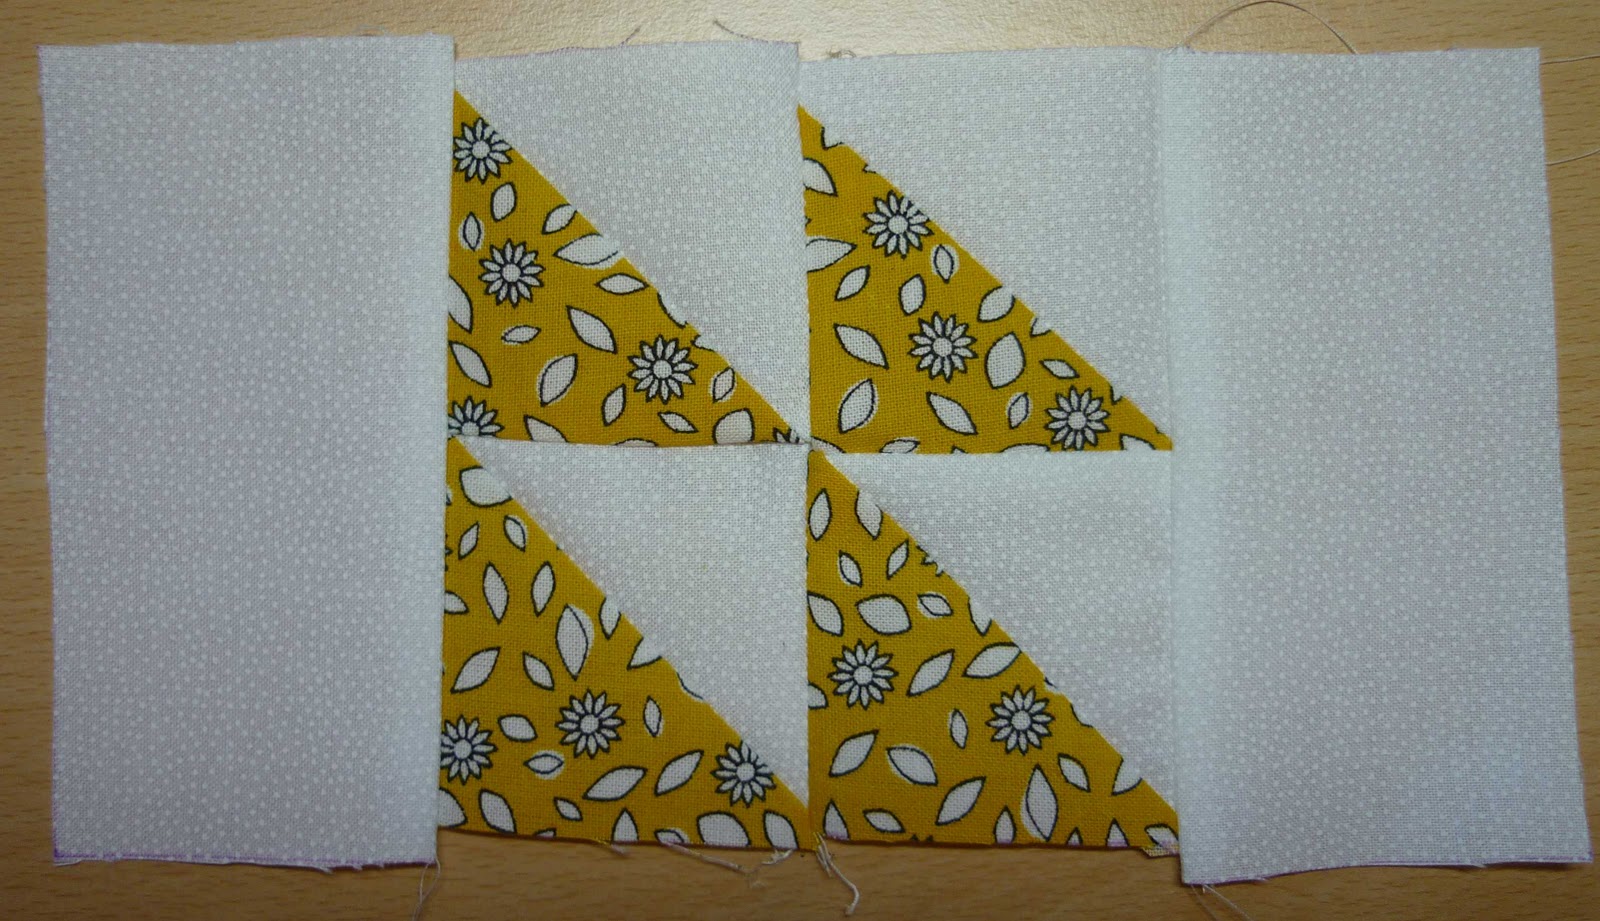
Anyway this block uses two of the templates from last week's sailboat block (the small triangle and the small rectangle), along with the big square from the first block (double four-patch).
One big square for the centre
Four rectangles
Eight triangles (four of each colour)
My block has four different fabrics, but you could easily make it out of just two.

Start by sewing the small triangles to make small squares
Fabric laid out after I'd sewn the small triangles together
Then you make up the horizontal strips by sewing two small squares to one rectangle, and the two other rectangles to the central big square.
Finally you sew the horizontal strips together to make a square
I think I need to work on the accuracy of my seam allowances and make myself a guide to stick to my sewing machine as well as just using the presser foot, as the seams should line up and they don't really!

The edges aren't completely straight either, I think I had too much seam allowance when I was sewing together the small triangles, but I can hide the wobbly edges when I sew the whole quilt together!

Thursday, January 26, 2012

Quilting: Sailboat - 26/1/12

This week's quilt block is a stylised picture of a boat. It has more pieces than the first two and so it's more complicated!
It has four colours and four different shapes. The colours are for the sky, the sea, the sails, and the boat. The shapes are small triangles, small recangles, long rectangle and trapezium (though you could make the trapezium out of one small rectangle and two triangles I suppose).
When you are sewing this block together, it's important to press the seams as you go, otherwise it will probably end up all lumpy at the back and won't lie flat at the end!
The pattern and number of shapes can be seen in the picture below
Cut pieces ready for sewing
First you sew the small triangles of sky to the sails (to make squares):
Then you sew the small squares together to make a big square (as in the double four-patch block), and then the rectangles of sky go on each side:
For the boat/sea half, first the trapezium boat sews onto the triangles of sea, then the long rectangle of sea goes along the bottom:
Finally top and bottom halves join together to make the finished block

My block has gone a bit crooked, I think this is because my final seam wasn't straight. I'll see how well the next few squares turn out, and if it's too annoying I'll unpick it and re-do it.

Friday, January 20, 2012

Quilting: Whirlwind - 20/1/12

Another quilt block this week. This one is called 'Whirlwind' because it looks like a windmill. It looks quite complicated but it's made up of just 8 pieces.
The finished block
First of all, you sew the white triangles to the coloured trapeziums:
Then you stitch together one of each colour to make a bigger triangle:
And finally, you stitch the two halves together to make the square block.

I use the edge of the foot on the sewing machine to make sure the seams are the same width, but I had bought a magnetic guide before I realised the foot was the right width to use instead. It's coming in useful to keep the pins on as I take them out of the fabric:

Sunday, January 15, 2012

Quilting: Double Four-patch - 14/1/12

I've started learning to quilt, to make a sampler quilt made up of lots of different blocks with different patterns. Hopefully this means I can do some sewing but it won't take up too much of my time. I'm going to make one block a week, and this week I started with a double four-patch block. This is made up of two big blocks and eight little blocks, as you can see:

It's quite easy to make, first of all you sew together the smaller squares into a big square and then you sew all four big squares together. I'm using my lovely sewing machine to make this as I'm too lazy to hand-sew so much (also I'd just sew it wrong and have to unpick everything!)
If you want to make one yourself, my templates for the small squares are 63mm (2.5 inches) square, and the large squares are 112mm (4 3/8 inches) square. This gives you 6mm (1/4 inch) seam allowance, and the finished block is about 30cm or 12 inches square.

When I do more complicated patterns, I'll try to take pictures as I go along to make it clearer how you sew it together.

Friday, October 7, 2011

Christening card - 6/10/11

The baby I made a card for a few months ago is being christened, so I thought I'd make a similar card for her christening.
Birth cardChristening card
I gluyed together the sky & hills, then I cut out the cross and stuck everything to the main card so that the white showed through. The rays of light and letters were added later.

Wednesday, September 21, 2011

Sewing covers for things - 20/9/11 & 21/9/11

More adventures with the sewing machine (and projects I've been meaning to make for a while).
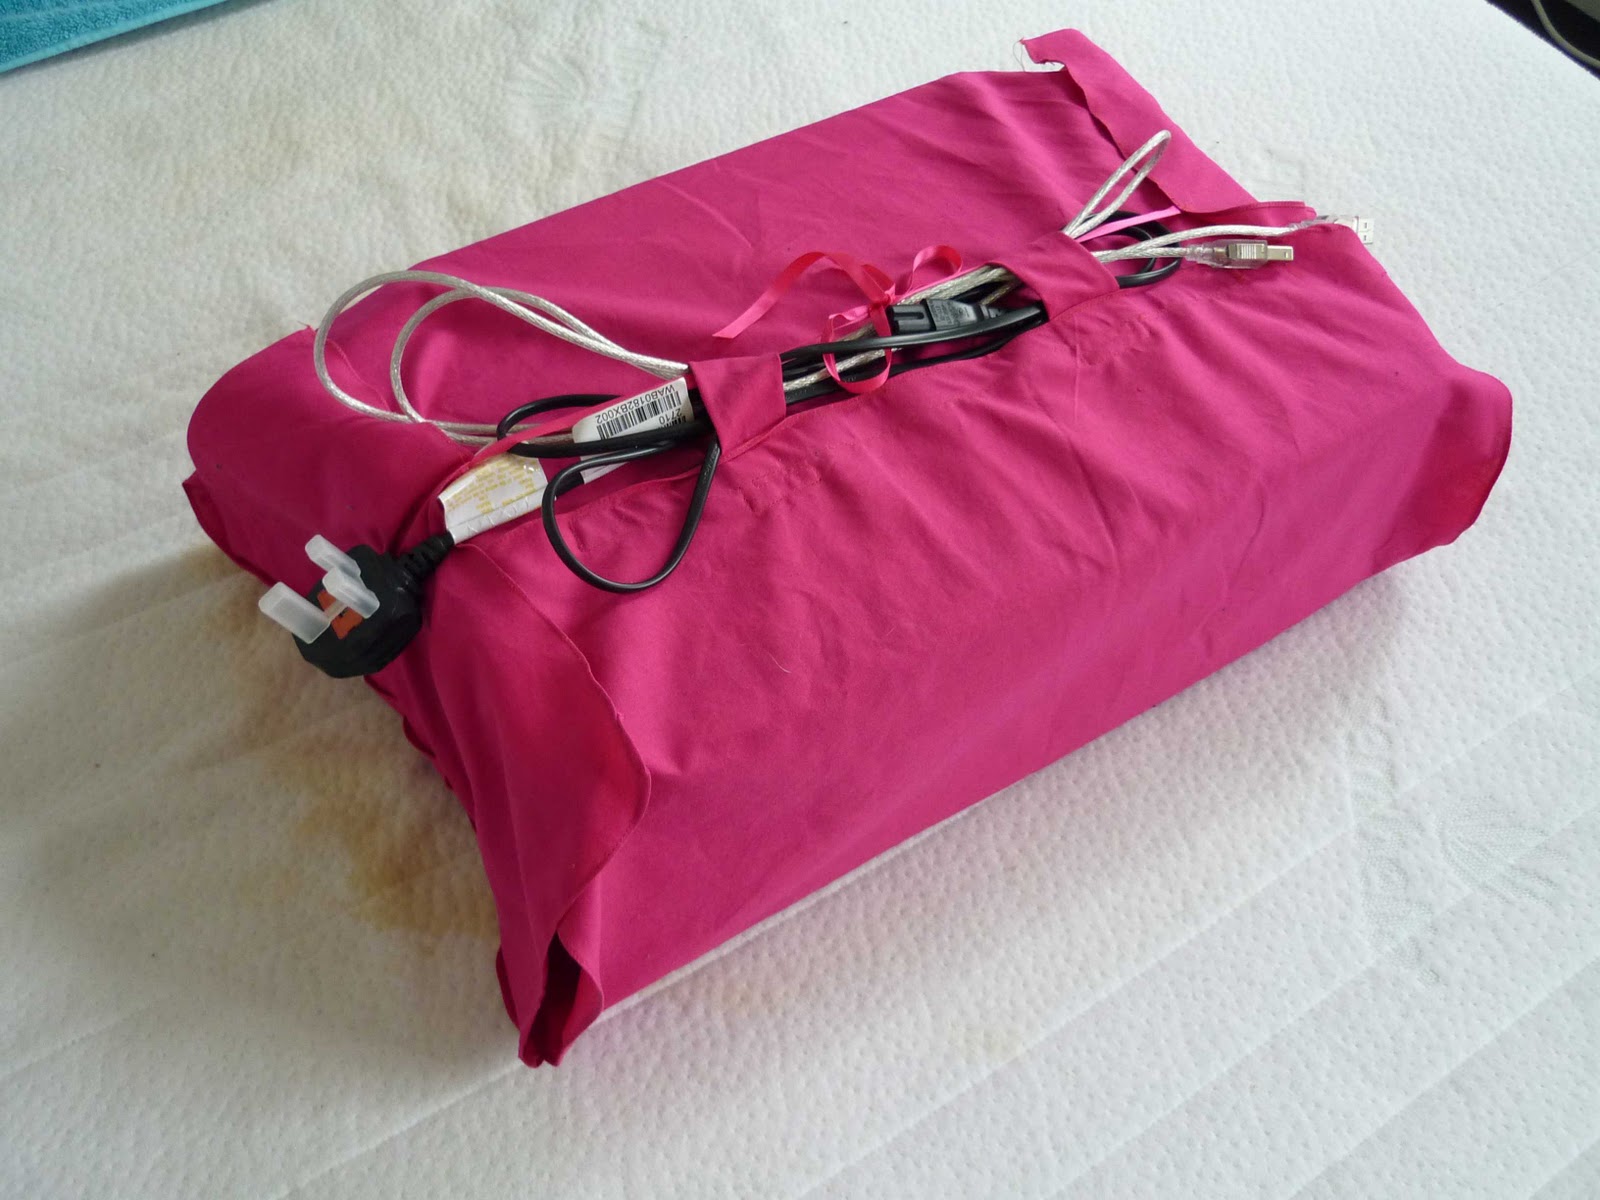
Yesterday I made a cover for our printer. It's not a complicated shape, just a cuboid, and it lives under the bed, but the box it came in doesn't. So I wanted to make a cover to stop it getting scratched and to keep the cables together with the printer.
Laid out flat
With the printer

The cover is just a basic cuboid net made out of pink cotton as you can see. The main part wraps around and fastens with velcro, and the sides tie with ribbon at the top of the printer.

The cable tidy loops also fasten with velcro and the ribbon from the sides thread through them for extra security.
It it a simple shape, the long wrap is all one piece and the sides are sewn on separately. All the pieces were hemmed using the hemmer foot so I didn't need much seam allowance.

Today I tried to make a cover for the sewing machine so that the case doesn't get scratched (and so that people don't try to pick it up by the handle!) I used some cloth which I have which has two layers and is an iridescent purple colour. The underneath layer has quite thick threads, so it frays quite easily but the two layers are woven together using regular stripes which makes it easy to cut straight lines!

Fabric ready for cuttingSide pieces cut out
I thought I could use the hemmer foot but the fabric was too thick to fit into it so instead I pinned and sewed them with the normal foot:
Pinned edgeHemmed corner finished

So here is the finished cover
The only problem is that I didn't leave enough seam allowance so it doesn't actually fit properly around the machine. It ties around with ribbon so it fits around but doesn't cover all of the corners.
I'm going to cut it in half and add a strip of contrasting fabric so that it fits properly. I might see if I can find some aida band and add small motifs to make it pretty.

Monday, April 4, 2011

Notelet - 4/4/11

I was listening to a programme on the radio about how writing actual letters (not emails) is good, and I remembered that I owe a friend a letter from Christmas time. (The programme is available until next Sunday 10th April from iPlayer if you're interested)

I have some notelets but I thought it would be nice to make her a card as she is quite a crafty person herself. I wrote the letter and then I decorated the card. Here it is:

The design is done so that the card is landscape but it would look just as good on a portrait card as well:

It is made from a white pre-folded A6 card, pink paper, flowers from the patterned purple translucent paper and copper coloured skeleton leaves.
I seem to be keeping the postal system in business lately, I'm sending so many cards. I had forgotten how much I liked making them!