Since it's nearly the end of 2019, everyone is posting pictures of themselves ten years ago and now to compare.
Well here's a different kind of ten year challenge - I got this cross stitch kit ten years ago with a magazine, and I just made it this week after being in a box for a decade!
I did need to look up how to do French knots as I had forgotten how to do them, but I found this useful tutorial.
I always try to make the back neat as well as the front, but the back stitch makes this a bit tricky.
Friday, December 27, 2019
Tuesday, December 24, 2019
Toddler apron again
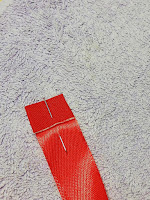
I've been making a toddler sized apron for one of my daughters friends, like the one I made in March (tutorial here), but this time instead of getting applique letters I decided to cross stitch the name onto some aida band. I haven't done cross stitch for ages and had to unpick a few times due to not counting correctly, but now it's sewn on I like it.
And I even had some ribbon to use as a label!
I hope she enjoys wearing it.
Saturday, December 21, 2019
Baby bauble Christmas gift
I got this idea from someone else on the Internet, but it's cute so I'm going to share it anyway.
It's super easy:
It's super easy:
- One clear plastic hollow bauble (can get them at craft shops)
- One piece of ribbon the length of the baby (as I was making for a friend, I gave them a piece of ribbon a metre long and they can cut it to the right length)
- Small piece of ribbon to hang it from
- Label
Saturday, May 18, 2019
Finding pins: finishing things off
Clothes worth wearing are worth repairing
The cobbler where I used to take me shoes to be re-heeled had a little line of text across the ticket he gave to the customer to keep track of the shoes “Shoes worth wearing are worth repairing”. You could say the same about clothes too. I’ve been a bit quiet on the crafty front lately, because I’ve been tackling the Dreaded Mending Pile.
Step 1: remember where I have hidden the mending pile
Step 2: make a list of what I need to buy to mend things with
Step 3: actually get around to mending things.
Some of the things to be mended were actually small five minute jobs, like replacing a button. I had a dress where I thought the zip had broken but actually it was only the but that you pull that was broken, so I just made a new tag instead of replacing the zip.
I had a top that needed the elastic replacing on the smocking, that was also a smaller job than I thought once I got hold of some shirring elastic. It looks as good as new.
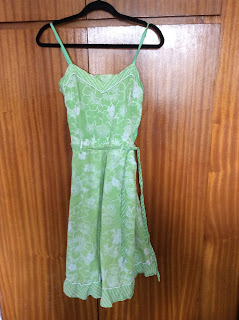
The biggest job was one of my summer dresses - it has four belt loops and they had all pulled out of the bodice, ripping the fabric. Now I like this dress so I didn’t want to throw it away, so I decided to strengthen the bit where the belt loops attach to with some interfacing, and then I sewed the loops back on by hand.
It may have been a nuisance to have to do mending, but I’m glad I actually did it because now I can start on a new shiny project with a clear conscience!
Saturday, May 4, 2019
Reversible toddler sun hat - free pattern from Oliver + S
It's getting to be that time of year again where the child needs a sunhat, so I decided to make her one out of some fabrics from my stash.
I used this free pattern from Oliver + S.
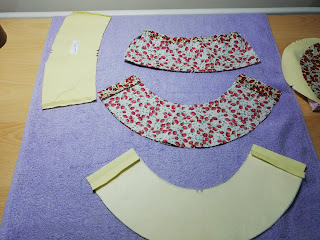
Here are my fabrics, I used two fat quarters that I already had and some ribbon that I also had so I have managed to make a project without buying any additional stuff (which I never normally do!)
Mainly I followed the pattern instructions, with a couple of variations:
- I added two ribbon ties at the side seams when attaching the sides to the brim so that we can tie it to her head (it doesn't actually keep it on her head much more that usual unfortunately) - Initially I hand stitched the final seam as the pattern instructed, but I don't like how the hand stitching looks so I am planing to machine sew a seam very near the join and take out the hand stitches. I am using a contrasting thread as I like the way it stands out.
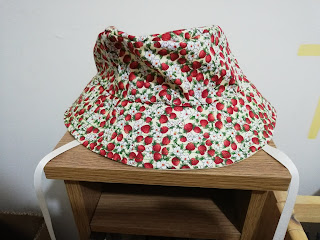
And here we are! A reversible sunhat which can also double as a rain hat if it’s not too wet.
She even kept it on her head long enough for me to take a photo< Br/>
Mainly I followed the pattern instructions, with a couple of variations:
-
- I pressed the edge of the side pieces 1/2" to make it easier to create the seams between the side, crown and brim. It's quite tricky to pin otherwise.
- I added two ribbon ties at the side seams when attaching the sides to the brim so that we can tie it to her head (it doesn't actually keep it on her head much more that usual unfortunately) - Initially I hand stitched the final seam as the pattern instructed, but I don't like how the hand stitching looks so I am planing to machine sew a seam very near the join and take out the hand stitches. I am using a contrasting thread as I like the way it stands out.
And here we are! A reversible sunhat which can also double as a rain hat if it’s not too wet.
She even kept it on her head long enough for me to take a photo< Br/>
Wednesday, May 1, 2019
Yarn substitution
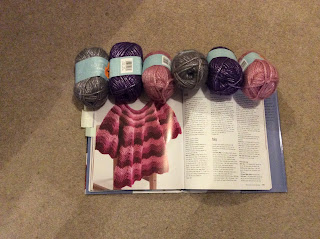
When I do crochet, I get quite a few free patterns from various sites online, however these are often sponsored by particular brands or suppliers and I can’t always source the same yarn especially if it’s a North American site rather than a European one.
I generally get around this by looking up the specified yarn on the manufacturer’s website, getting the length of yarn per ball and finding a similar yarn that my local shop stocks that I like. This is generally ok but can be a bit of a hassle. However today I discovered that somebody clever has made a site that does the substitute for you!
Yarnsub is the site - I’m not sure if they have all manufacturers covered but at least it will give you a good place to start. Hope this is helpful!
Wednesday, April 24, 2019
Where are all my pins? UFOs and the pile of shame
I'm sure many crafters have a similar problem to this: you go to start a new project, but your pins/crochet hook/ embroidery hoop are still being used for a previous project that's not quite finished yet.
This year, I'm trying to finish off some of my UFOs (unfinished objects). So far I've completed three new projects and not finished any old ones!
So here's a list of my current UFOs and how long it's been since I started them. At the end of the year I'll do a review post to see how many I managed.
Crochet shawl - started Nov 2018 My friend was making shawls to give to a women's shelter near her, and I offered to help. However life got in the way and somehow this got abandoned. Hopefully I can finish it off before next winter. 40% complete.
Dress - started May 2016 After I finished my vampire cosplay, I was all enthusiastic about sewing and I found a pattern for a summer dress that I could do as part of a sew-along blog. I was most of the way along (though the instructions were a bit frustrating) and then I found out I was pregnant so it seemed kind of pointless trying to make a dress that might never actually fit me. I packed away my sewing machine into a cupboard as we needed that room for the nursery. However I'm now more or less the size I used to be, so I'm going to try to finish this off and adjust the size a bit if I need to. 75% complete
Quilted Square - started Feb 2014 I intended to make this for a friend's baby when it was born. The child is now five. I have the quilting all done, I even made a label but somehow I didn't manage to finish hand stitching the binding around the edges. 90% complete

Fabric baby book - started 2007
I got a kit to make a baby book with embroidery when my niece was born. She's eleven now and I still haven't done it! I would have made it for my daughter if I had remembered where it was. 5% complete
Camp blanket - started 2000 ish You could argue that a camp blanket is never finished as you keep collecting badges throughout your life. This is true, but I have quite a lot of badges to sew on in a bag somewhere. Priority low as I don't go camping any more! Kingfisher cross stitch - started 2003 This was a Christmas present from my sister as my name when I helped with Brownies was Kingfisher. The main part of the picture is done, but I have quite a lot of awkward stitches on their own to finish the picture. This has been packed away in a cupboard for about eight years. 60% complete.
Last but not least - the mending pile There are several things gathering dust on my mending pile. I should really get around to fixing them - if I could remember where I tidied it away to. I'm not going to bother listing the projects that I bought things for and never actually started. That would be too long of a list...
Dress - started May 2016 After I finished my vampire cosplay, I was all enthusiastic about sewing and I found a pattern for a summer dress that I could do as part of a sew-along blog. I was most of the way along (though the instructions were a bit frustrating) and then I found out I was pregnant so it seemed kind of pointless trying to make a dress that might never actually fit me. I packed away my sewing machine into a cupboard as we needed that room for the nursery. However I'm now more or less the size I used to be, so I'm going to try to finish this off and adjust the size a bit if I need to. 75% complete
Quilted Square - started Feb 2014 I intended to make this for a friend's baby when it was born. The child is now five. I have the quilting all done, I even made a label but somehow I didn't manage to finish hand stitching the binding around the edges. 90% complete


Camp blanket - started 2000 ish You could argue that a camp blanket is never finished as you keep collecting badges throughout your life. This is true, but I have quite a lot of badges to sew on in a bag somewhere. Priority low as I don't go camping any more! Kingfisher cross stitch - started 2003 This was a Christmas present from my sister as my name when I helped with Brownies was Kingfisher. The main part of the picture is done, but I have quite a lot of awkward stitches on their own to finish the picture. This has been packed away in a cupboard for about eight years. 60% complete.
Last but not least - the mending pile There are several things gathering dust on my mending pile. I should really get around to fixing them - if I could remember where I tidied it away to. I'm not going to bother listing the projects that I bought things for and never actually started. That would be too long of a list...
Labels:
baby,
blanket,
book,
clothes,
crochet,
cross stitch,
quilt,
sewing,
unfinished
Monday, April 15, 2019
More children’s backpacks, and an adjustment to the ribbon ends
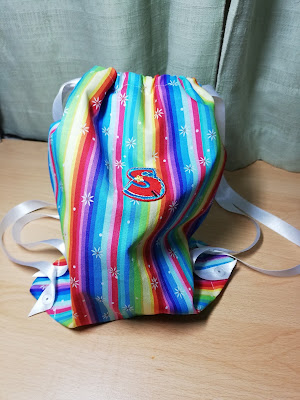
I've been busy lately making more backpacks for my friends children. Here they are all together:
I also noticed that cutting the ribbon ends diagonally wasn't enough to stop them fraying, so the ones that were already done I sealed with clear nail varnish. The ones that weren't done yet, I cut a small square of iron on interfacing to iron to the end and folded over so that when the snap was attached it would be through a double thickness of ribbon.
Hopefully this will stop the ends from fraying, though on reflection I should have used hemming tape not interfacing.
Anyway that's enough bags for now! Next on the list is a sunhat for the small one.
Sunday, April 7, 2019
Vibes & Scribes, my favourite shop!
I’m still making more of the drawstring bags so not much to update on the crafty front, but I thought I’d write a little post about how much I love my local crafty shop. There are other crafty shops in Cork but Vibes & Scribes is the one that caters to the biggest variety of crafts so whatever you are wanting to make, you can probably find things to make it there. (This isn’t an advert, just a review by a happy customer).
There are actually two Vibes and Scribes shops, one is a book shop (which is also great) but the crafty shop is my favourite. It’s over three floors, which can be annoying as there’s no lift, so if you need to go in with a pram or pushchair it’s best to have a friend with you to mind the pram if you need something that’s not on the ground floor. If you were unable to manage the stairs, I’m sure the staff would help find what you were looking for but you would miss out on being able to browse.
The ground floor is the sewing floor - it has all the ribbons, notions, buttons etc and at the back is all the lovely fabric. They also cut the ends of the fabric rolls up into fat quarters along with having the coordinating fat quarter bundles, so sometimes if you just need a little piece of fabric you can have a little rummage through the fat quarters box for some pretty fabric for smaller projects.
Down in the basement is an Aladdin’s cave of yarn. Lovely wool and cotton of all different colours and weights and lots of patterns to turn it into blankets or jumpers or whatnot. The shelves are floor to ceiling with a wonderful array of colours and I love just going in for a look (though that can be dangerous as I always accidentally buy something). Upstairs on the first floor is the paper crafting, painting, all the other kinds of craft that you might want to do that doesn’t involve fabric or wool basically.
Other things I love about Vibes & Scribes include their workshops that they run so that people can learn a new craft or develop in a craft they already know. They even have a loyalty card so that I can pretend to myself that I am spending less money than i actually am! Oh, and if somebody nice gets you a gift voucher, they don’t have an expiry date. They will honour the voucher however long ago it was bought.
They have even been featured on a stamp By An Post!
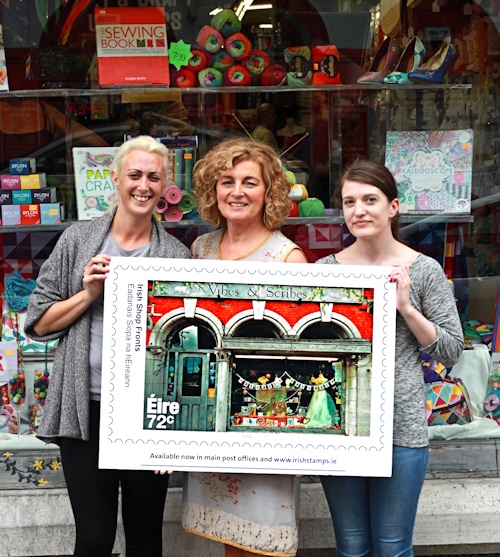
I forgot to mention how nice the staff are too. The only problem is leaving without buying the whole shop.
There are actually two Vibes and Scribes shops, one is a book shop (which is also great) but the crafty shop is my favourite. It’s over three floors, which can be annoying as there’s no lift, so if you need to go in with a pram or pushchair it’s best to have a friend with you to mind the pram if you need something that’s not on the ground floor. If you were unable to manage the stairs, I’m sure the staff would help find what you were looking for but you would miss out on being able to browse.
The ground floor is the sewing floor - it has all the ribbons, notions, buttons etc and at the back is all the lovely fabric. They also cut the ends of the fabric rolls up into fat quarters along with having the coordinating fat quarter bundles, so sometimes if you just need a little piece of fabric you can have a little rummage through the fat quarters box for some pretty fabric for smaller projects.
Down in the basement is an Aladdin’s cave of yarn. Lovely wool and cotton of all different colours and weights and lots of patterns to turn it into blankets or jumpers or whatnot. The shelves are floor to ceiling with a wonderful array of colours and I love just going in for a look (though that can be dangerous as I always accidentally buy something). Upstairs on the first floor is the paper crafting, painting, all the other kinds of craft that you might want to do that doesn’t involve fabric or wool basically.
Other things I love about Vibes & Scribes include their workshops that they run so that people can learn a new craft or develop in a craft they already know. They even have a loyalty card so that I can pretend to myself that I am spending less money than i actually am! Oh, and if somebody nice gets you a gift voucher, they don’t have an expiry date. They will honour the voucher however long ago it was bought.
They have even been featured on a stamp By An Post!

I forgot to mention how nice the staff are too. The only problem is leaving without buying the whole shop.
Saturday, March 30, 2019
Drawstring backpack
My daughter loves trains, so a while ago I hunted through my local crafty shop for some train fabric, bought a metre and then thought “what can I actually make with this?” Someone suggested I make her a little bag, so I figured I could make her a drawstring bag that she could use as a backpack to carry her toys around in. I’ve made myself a drawstring bag previously to use as a dice bag, so I knew they weren’t too hard, I just needed to work out the size and how to attach the strings so it could be a backpack.
I then got a bit carried away with myself and decided to make some for her little friends, too, so the pictures in this will have a few different fabrics but the bags are all made the same way. You could probably make one in an evening or two, it took me less than a week to make three (and some days I only have an hour to do sewing).
I based my design on this tutorial by Kristin Omdahl, but I’ve adapted it so I thought I’d do a proper tutorial for this version.
Materials list - for a toddler sized backpack
Fabric - depending on the pattern of the fabric, you might need more but you should be able to make one bag out of a fat quarter, or two bags out of half a metre of fabric.
Cotton thread - to sew it together with
Cord or ribbon - for the drawstrings. For toddler sized straps, you’ll need two metres length. For it to be comfortable on an adult, you’ll need 2.5 to 3 metres.
Something to attach the strings to the corners of the bag - I used Kam snaps so that I can easily detach and replace the strings if they get broken or are the wrong length, but you could also make a reinforced hole in the corner of the bag (using a metal ring or something similar) and thread the strings through that.
Other useful items - sewing machine (as it’s all straight stitch you could sew it by hand but it would take a lot longer), iron, needle to sew in the ends, pins, scissors, bodkin or safety pin to thread the string through the channel. If you’re using Kam snaps as an attachment, you’ll need a press to attach them with also. Most suppliers of the snaps will sell the presses too.
How big a piece of fabric do I need?
This took me a while to figure out, but finally I worked it out with help from a sketch that I made. Measurements are in inches because the numbers are smaller for me to work out, but the principle is the same whatever measurements you use.
1. Decide how big a bag you want. Length (x), height (y) and width of the bottom (w).
2. How much seam allowance (a) do you want? (I used half inch seams, partly because it made the numbers easy to work out, partly because that was in the tutorial I was following)
3. How wide a channel (c) do you want for your strings? (As I am using ribbon, my channels ended up about an inch wide).
4. Are you using one piece of fabric folded at the base, or two pieces sewn together? (If you’re using one piece, double the length and take off 2a)
5. Maths time! (See my sketch)
a) Two pieces of fabric: x + 2a by y + 2a + 2c + 0.5w
For a bag 10” long by 10” high with a bottom width of 3”, I used two pieces of fabric 11” by 15”. As it’s a bag, the size can vary to suit how big your fabric is - i had a piece of fabric that was 40” wide so I cut the pieces 10” wide for that so that I could make two bags from the one piece of fabric.
b) One piece of fabric: x + 2a by 2(y + 2c + a + 0.5w)
For a 10” long by 10” high bag, I would use one piece of fabric 11” by 28”. This only works if you have a fabric pattern that doesn’t matter if it’s upside down, though!
These instructions will be for making the bag out of two pieces of fabric, but the tutorial I linked above uses only one piece so refer to that if my instructions are confusing you.
Step One: Iron your fabric!
It might seem like a waste of time but it is essential if you want to measure the fabric properly and have it turn out looking good.
Step two: Measure fabric, mark out, check it! Cut it.
Especially check that you have marked out a rectangle with square corners and not drawn one of the edges slightly wonky.
Step Three: Press and sew the hems
Fold over half an inch of fabric on each side and press it with an iron (if you get a good enough crease with the iron, the fold will stay and you won’t need to pin it). Sew the hems a quarter of an inch in from the fold (if you have fabric that’s likely to fray a lot, you might need to do a double fold so that the raw edge is turned under when you sew it.)
Step Four: Channel for the drawstring
Check how big of a channel you want and fold down the top edge of each piece of fabric so that it will be wide enough for the string to run through easily. You will have two strings so make sure you allow for them both if you’re using thick cording as a string. Stitch along the line you sewed for the hem so that the channel stays the same size all the way along.
Step Five (optional): decorate your fabric
If you have anything to decorate the bag with (I added a letter motif for the child’s initial), now is the best time to add it as you can judge the position on the finished bag. Remember that the final bag will be an inch or so shorter than the fabric you have now as we haven’t allowed for the base yet.
Step Five: Pin together and make up
If you’ve been careful with your measuring and consistent with your hems etc, you should now have two rectangular pieces of fabric the same size as each other. I was slightly lazy with my hemming accuracy so the two pieces were not quite matching. Either way, the critical bit is that the two channels line up with each other - any excess at the base of the fabric will just go into the seam inside the bag and nobody will ever know except you!
Press the fabric again so it looks neat, then pin the two pieces right sides together, making sure that the two channels line up. Stitch along the hem lines of the two sides and bottom (if your fabric isn’t perfectly aligned, put the smaller piece on top so you can check that you are catching the edge in you stitching). Stop just by the top hem that is now forming the channel so that you don’t sew up the channel or the top of the bag.
Turn it the right way out. You now have a decent looking bag! You will need to use something like a pencil to make sure the corners are turned out as well as you can get them - the two hems meeting make the corner a little too bulky to turn out all the way.
Step Six: The base
Fold the bottom corner flat so that it’s like a triangle. (See picture). Measure across the width that you want your bag to be, mark and pin along that line. Stitch along the line - you will now have your bag with two little flaps at each corner, that you can attach the strings to.
Step six: the drawstrings
Cut two lengths of string/ribbon/whatever you’re using. I’m using ribbon so that I can attach the Kam snaps to the end easily. For toddler size straps, you’ll want two lengths of one metre each approx. Using a bodkin or a safety pin, thread them through the channel so that you have two strings, running all the way around the channel, in opposite directions, with the loose ends coming out of the ends of the channel at each side of the bag.
Attach the snaps - I wanted each end to be separate, so I used four snaps total for each bag. You’ll need one on the corner of the bag and a corresponding one on the end of the ribbon.
If you’re making a reinforced hole to thread the strings through, you can do that before or after you thread the strings. The just thread them through the hole and knot them.
And there you have it! A lovely bag!
I then got a bit carried away with myself and decided to make some for her little friends, too, so the pictures in this will have a few different fabrics but the bags are all made the same way. You could probably make one in an evening or two, it took me less than a week to make three (and some days I only have an hour to do sewing).
I based my design on this tutorial by Kristin Omdahl, but I’ve adapted it so I thought I’d do a proper tutorial for this version.
Materials list - for a toddler sized backpack
Fabric - depending on the pattern of the fabric, you might need more but you should be able to make one bag out of a fat quarter, or two bags out of half a metre of fabric.
Cotton thread - to sew it together with
Cord or ribbon - for the drawstrings. For toddler sized straps, you’ll need two metres length. For it to be comfortable on an adult, you’ll need 2.5 to 3 metres.
Something to attach the strings to the corners of the bag - I used Kam snaps so that I can easily detach and replace the strings if they get broken or are the wrong length, but you could also make a reinforced hole in the corner of the bag (using a metal ring or something similar) and thread the strings through that.
Other useful items - sewing machine (as it’s all straight stitch you could sew it by hand but it would take a lot longer), iron, needle to sew in the ends, pins, scissors, bodkin or safety pin to thread the string through the channel. If you’re using Kam snaps as an attachment, you’ll need a press to attach them with also. Most suppliers of the snaps will sell the presses too.
How big a piece of fabric do I need?
1. Decide how big a bag you want. Length (x), height (y) and width of the bottom (w).
2. How much seam allowance (a) do you want? (I used half inch seams, partly because it made the numbers easy to work out, partly because that was in the tutorial I was following)
3. How wide a channel (c) do you want for your strings? (As I am using ribbon, my channels ended up about an inch wide).
4. Are you using one piece of fabric folded at the base, or two pieces sewn together? (If you’re using one piece, double the length and take off 2a)
5. Maths time! (See my sketch)
a) Two pieces of fabric: x + 2a by y + 2a + 2c + 0.5w
For a bag 10” long by 10” high with a bottom width of 3”, I used two pieces of fabric 11” by 15”. As it’s a bag, the size can vary to suit how big your fabric is - i had a piece of fabric that was 40” wide so I cut the pieces 10” wide for that so that I could make two bags from the one piece of fabric.
b) One piece of fabric: x + 2a by 2(y + 2c + a + 0.5w)
For a 10” long by 10” high bag, I would use one piece of fabric 11” by 28”. This only works if you have a fabric pattern that doesn’t matter if it’s upside down, though!
These instructions will be for making the bag out of two pieces of fabric, but the tutorial I linked above uses only one piece so refer to that if my instructions are confusing you.
Step One: Iron your fabric!
It might seem like a waste of time but it is essential if you want to measure the fabric properly and have it turn out looking good.
Step two: Measure fabric, mark out, check it! Cut it.
Especially check that you have marked out a rectangle with square corners and not drawn one of the edges slightly wonky.
Step Three: Press and sew the hems
Fold over half an inch of fabric on each side and press it with an iron (if you get a good enough crease with the iron, the fold will stay and you won’t need to pin it). Sew the hems a quarter of an inch in from the fold (if you have fabric that’s likely to fray a lot, you might need to do a double fold so that the raw edge is turned under when you sew it.)
Step Four: Channel for the drawstring
Check how big of a channel you want and fold down the top edge of each piece of fabric so that it will be wide enough for the string to run through easily. You will have two strings so make sure you allow for them both if you’re using thick cording as a string. Stitch along the line you sewed for the hem so that the channel stays the same size all the way along.
Step Five (optional): decorate your fabric
If you have anything to decorate the bag with (I added a letter motif for the child’s initial), now is the best time to add it as you can judge the position on the finished bag. Remember that the final bag will be an inch or so shorter than the fabric you have now as we haven’t allowed for the base yet.
Step Five: Pin together and make up
If you’ve been careful with your measuring and consistent with your hems etc, you should now have two rectangular pieces of fabric the same size as each other. I was slightly lazy with my hemming accuracy so the two pieces were not quite matching. Either way, the critical bit is that the two channels line up with each other - any excess at the base of the fabric will just go into the seam inside the bag and nobody will ever know except you!
Press the fabric again so it looks neat, then pin the two pieces right sides together, making sure that the two channels line up. Stitch along the hem lines of the two sides and bottom (if your fabric isn’t perfectly aligned, put the smaller piece on top so you can check that you are catching the edge in you stitching). Stop just by the top hem that is now forming the channel so that you don’t sew up the channel or the top of the bag.
Turn it the right way out. You now have a decent looking bag! You will need to use something like a pencil to make sure the corners are turned out as well as you can get them - the two hems meeting make the corner a little too bulky to turn out all the way.
Step Six: The base
Fold the bottom corner flat so that it’s like a triangle. (See picture). Measure across the width that you want your bag to be, mark and pin along that line. Stitch along the line - you will now have your bag with two little flaps at each corner, that you can attach the strings to.
And there you have it! A lovely bag!
Note: A closed loop like the drawstrings can be a strangulation risk for babies and small children. That’s one reason why I used the snaps and attached the strings separately - in the hope that the snaps would form a weak point in the event of getting caught around the neck or arm. HOWEVER snaps like the ones I use are not actually designed for that purpose, so you should never leave a baby or child unsupervised with it just in case.
Friday, March 29, 2019
Toddler apron!
My toddler likes helping me bake, so my friend’s mum made her a little apron that she could wear.
My friend’s little girl also likes to bake, so I decided to use the one we have as a pattern to make her a present.
It’s very easy once you have the measurements so here’s a sketch:
I made a narrow hem using the hemming foot on my sewing machine, but if you don’t have a special foot you can just do a normal hem making sure that the raw edges are turned under so it doesn’t fray. That’s actually what I did on the top and bottom hems anyway.
Then I attached the ribbons for the apron strings. First I folded over about a quarter of an inch at the end as a hem so that it wouldn’t fray. I put Velcro on the neck ties so that it can be adjustable but also easy to take on and off. Lengths for the ribbons: 2 lengths of 15” long for the waist ties, 1 length of 8” long with about 1” Velcro (the scratchy hook side), 1 length of 12” long with about 4” Velcro (the soft loop side).
Finally, I also got some appliqué letters to spell out her name across the front.
I hope she likes it!
Subscribe to:
Comments (Atom)


