Saturday, May 18, 2019

Finding pins: finishing things off


So a while I posted about my unfinished projects. One of them was this quilt square, which only needed the binding finishing around the edges. I’ve finally got around to stitching it! Shame the baby I was making it for is now five years old. Luckily I have a couple of friends expecting so I’ve got one new baby present sorted! Also, look how many pins I have now they’re not stuck in this project

Clothes worth wearing are worth repairing

The cobbler where I used to take me shoes to be re-heeled had a little line of text across the ticket he gave to the customer to keep track of the shoes “Shoes worth wearing are worth repairing”. You could say the same about clothes too. I’ve been a bit quiet on the crafty front lately, because I’ve been tackling the Dreaded Mending Pile.
Step 1: remember where I have hidden the mending pile
Step 2: make a list of what I need to buy to mend things with
Step 3: actually get around to mending things.

Some of the things to be mended were actually small five minute jobs, like replacing a button. I had a dress where I thought the zip had broken but actually it was only the but that you pull that was broken, so I just made a new tag instead of replacing the zip.
I had a top that needed the elastic replacing on the smocking, that was also a smaller job than I thought once I got hold of some shirring elastic. It looks as good as new.


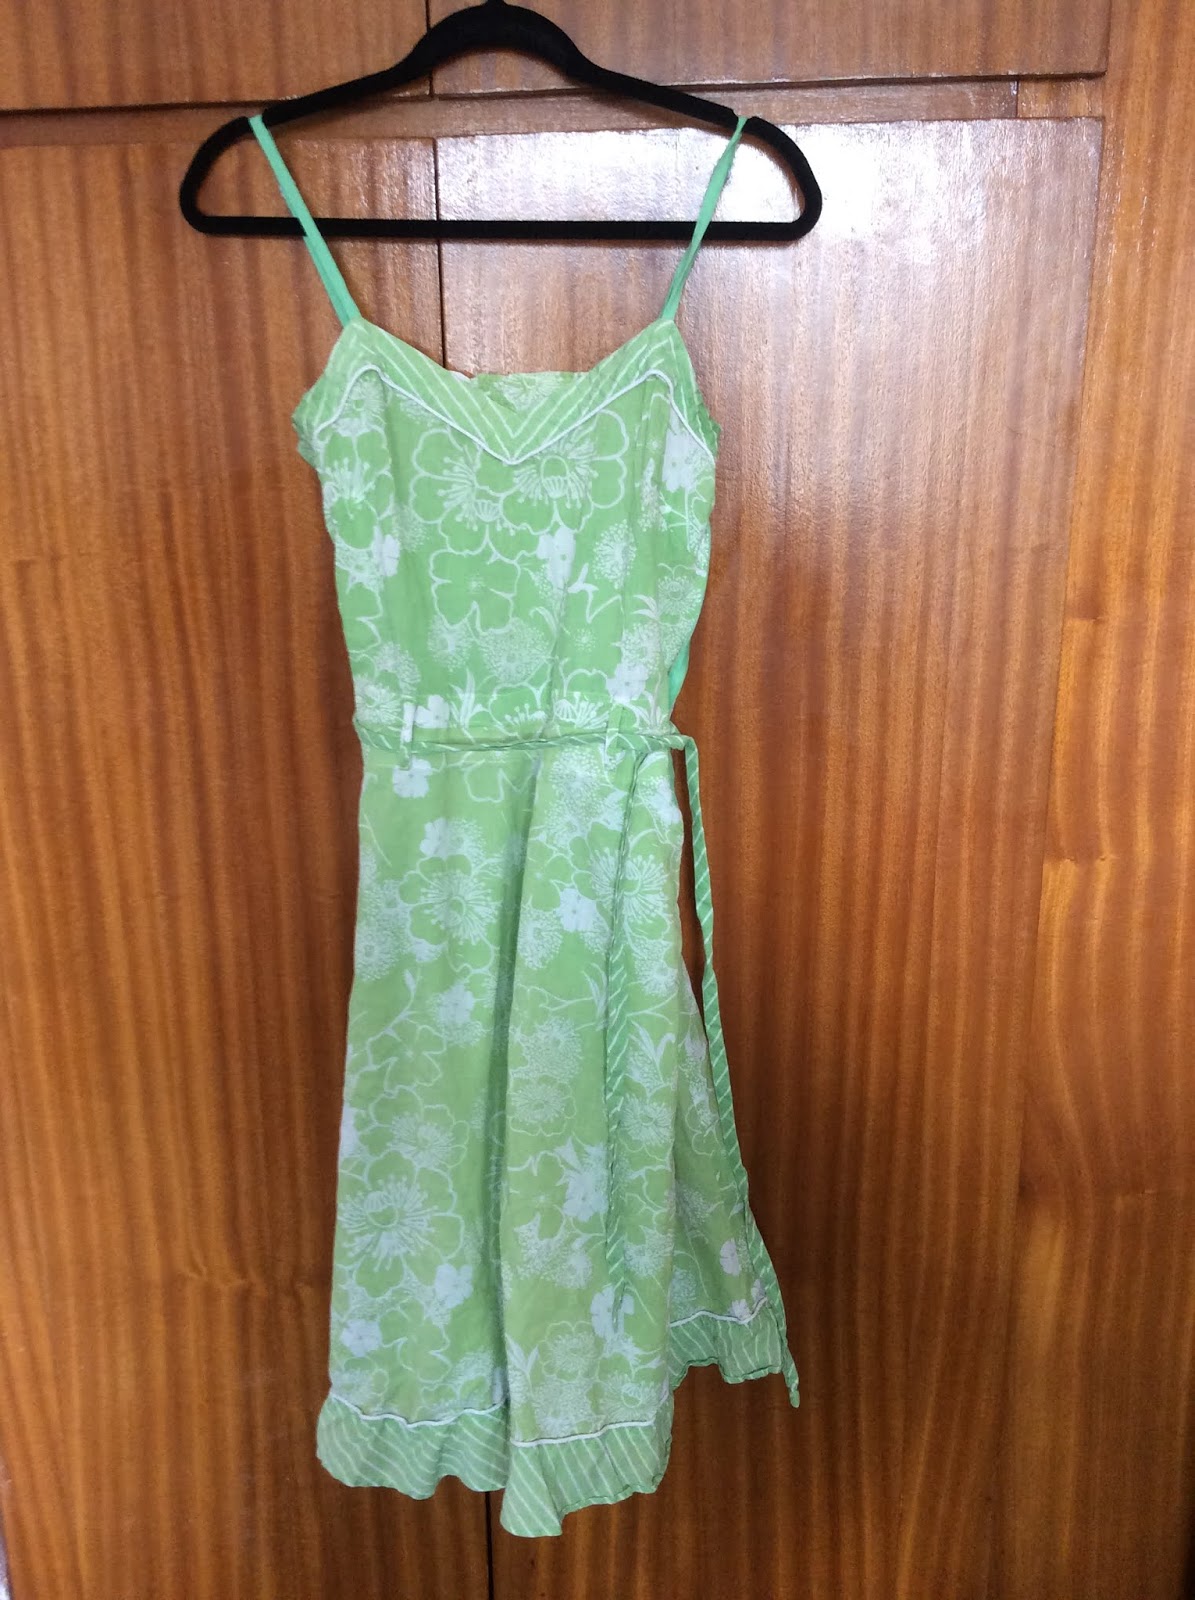
 The biggest job was one of my summer dresses - it has four belt loops and they had all pulled out of the bodice, ripping the fabric. Now I like this dress so I didn’t want to throw it away, so I decided to strengthen the bit where the belt loops attach to with some interfacing, and then I sewed the loops back on by hand.
It may have been a nuisance to have to do mending, but I’m glad I actually did it because now I can start on a new shiny project with a clear conscience!

Saturday, May 4, 2019

Reversible toddler sun hat - free pattern from Oliver + S

It's getting to be that time of year again where the child needs a sunhat, so I decided to make her one out of some fabrics from my stash. I used this free pattern from Oliver + S. Here are my fabrics, I used two fat quarters that I already had and some ribbon that I also had so I have managed to make a project without buying any additional stuff (which I never normally do!)
Mainly I followed the pattern instructions, with a couple of variations: - I pressed the edge of the side pieces 1/2" to make it easier to create the seams between the side, crown and brim. It's quite tricky to pin otherwise.
- I added two ribbon ties at the side seams when attaching the sides to the brim so that we can tie it to her head (it doesn't actually keep it on her head much more that usual unfortunately) - Initially I hand stitched the final seam as the pattern instructed, but I don't like how the hand stitching looks so I am planing to machine sew a seam very near the join and take out the hand stitches. I am using a contrasting thread as I like the way it stands out.
And here we are! A reversible sunhat which can also double as a rain hat if it’s not too wet.
She even kept it on her head long enough for me to take a photo< Br/>

Wednesday, May 1, 2019

Yarn substitution

When I do crochet, I get quite a few free patterns from various sites online, however these are often sponsored by particular brands or suppliers and I can’t always source the same yarn especially if it’s a North American site rather than a European one.
I generally get around this by looking up the specified yarn on the manufacturer’s website, getting the length of yarn per ball and finding a similar yarn that my local shop stocks that I like. This is generally ok but can be a bit of a hassle. However today I discovered that somebody clever has made a site that does the substitute for you!
Yarnsub is the site - I’m not sure if they have all manufacturers covered but at least it will give you a good place to start. Hope this is helpful!