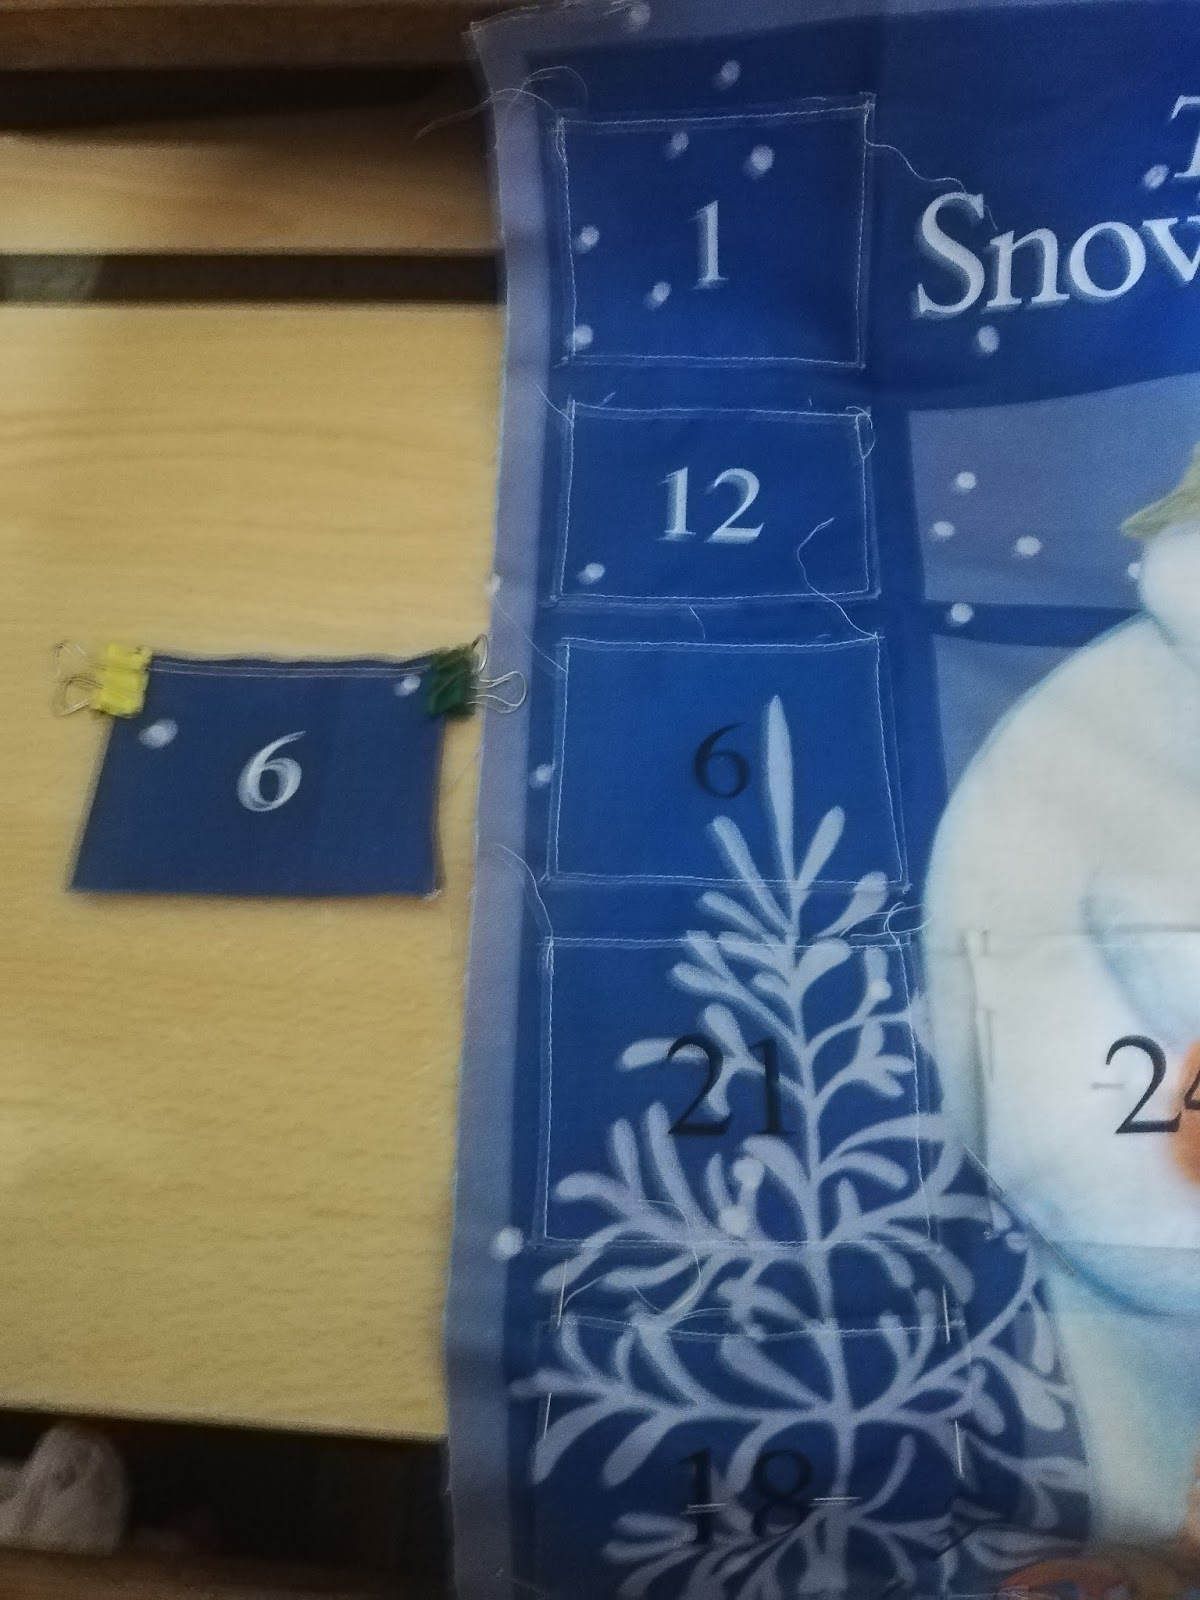
Not long after I had made my vampire cosplay, I found out I was pregnant and so the bedroom that I was using to sew in got taken over as a nursery and my poor sewing machine got put away in a cupboard for two years. It was always on my list of things to get back to at some point, so when I saw a kit for an advent calendar at Christmas time I couldn’t resist buying it to make for my daughter for next year. Eventually I got around to clearing the desk in the box room and turning it from a general dumping ground into a sewing room so I could settle down in the evenings and make the advent calendar.
The cutting out, pinning on and stitching on of all the little pockets took longer than all the other making up. I hate sewing in ends so I’m not sure why I thought it was a good idea to sew twenty five pockets onto a piece of fabric was a good idea. Each pocket had to be hemmed at the top as well so that was a hundred ends to sew in! Not to mention that I accidentally hemmed the wrong edge of pocket number nine so I almost had two number sixes.
Finally it was done, about a month after I started it but I did go on holiday for a week, so actually it’s not too bad. And it looks pretty good too. I hope she likes the Snowman...
Monday, March 25, 2019
Sunday, March 24, 2019
Past Crafts: Vampire Cosplay
One of my other hobbies is playing the trading card game Magic: the Gathering (not that I play very much these days but before my daughter was born I was more active). They release a new set of cards about four times a year, and in 2016 they released this card:
Heir of Falkenrath Gatherer Link
My first thought was “what a cool dress! I’d love a dress like that” and since I was going to a large tournament in Manchester while that card was current, I decided to make a cosplay.
So, where to start? Firstly I took a look at a larger sized image of the card art (the artist is Jason Rainville, by the way). In a way I’m lucky that this card has two images to work from as the two angles give me more of an idea of how the dress would be constructed.
Obviously it’s strapless, and looking at the second image you can see that the sleeves are actually completely separate, not like some dresses you would get that have the sleeves connect to the bodice without having fabric on the shoulders. So I decided that the easiest way to create that for an amateur like myself would be to buy a corset and decorate that, making the accessories.
Bodice decoration
Most corsets are not just laced up the back, but also have a fastening up the front formed from a pair of metal strips that hook together (a busk). This means that you can get the corset on and off easily without having to completely unlace the back or pull it over your head. Obviously the character’s dress has embroidery all the way across the front so I would need to hide the busk but also make it easy to get on and off so I made a false front decorated with a piece of bridal lace, which I attached to the corset with Velcro. My thought at the time was that I would be able to wear the corset at other times as well, but so far I’ve only worn it as part of the costume.
I had to make a couple of test pieces out of scrap fabric as well as a paper pattern so that I could make it fit the curves of the corset properly. In the end I didn’t manage to centre the lace perfectly which does annoy me a bit but not enough to re-do it.
Sleeves
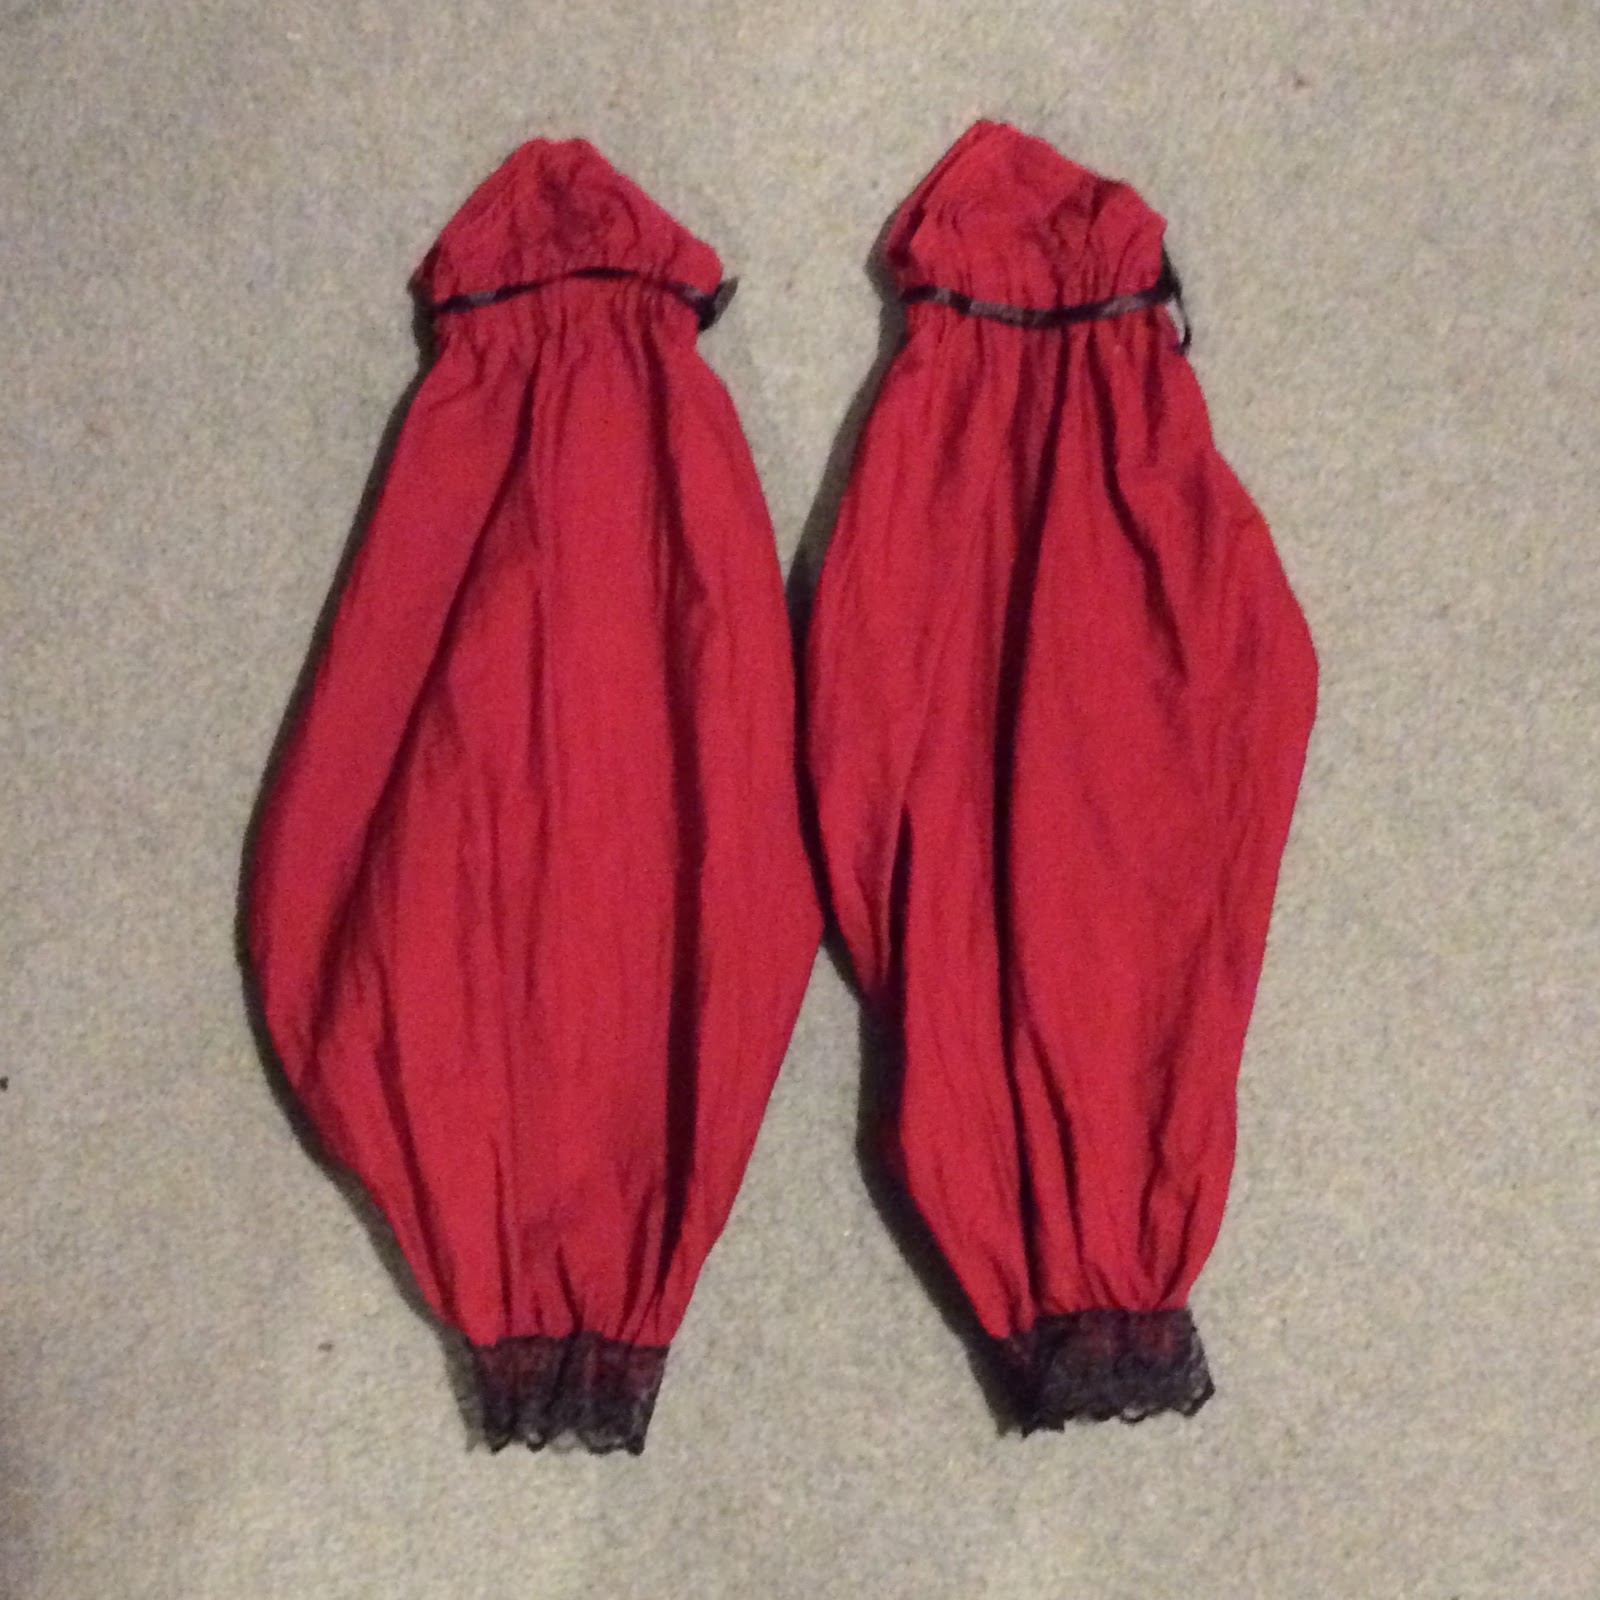
As I said earlier, the red sleeves are actually totally separate from the bodice. I wanted them to be nice and puffy so I gathered them at each end and added ribbon at the top to help them stay up and lace at the wrists for decoration. One of them does fall down more than the other but I think they are pretty effective.
Cloak
While the first image seems to show the cloak being attached across the vampire’s stomach with a jewelled chain, the second image has no sign of the chain and the cloak seems to be attached around the arms. I decided for reasons of practicality that I would attach the cloak around my sleeves with velcroed ribbon so that my arms would be fairly free to move about and so that I could put on and take off the costume unaided. I found a few tutorials online for making a child’s bat-wing cloak, and I adapted a pattern. It’s basically a rectangle with some arcs cut out for the batwing shape, and I gathered the top edge slightly to shape it a little. As it was going across the back of my shoulder blades rather than over my shoulders, I could get away with a simple shape. I also attached two rings so that I could hook it to the back of the corset so that it didn’t droop at the back.
Choker
One of the key things about this character’s outfit that you might not notice at first, is that the ‘negative space’ between her choker, her neckline and her sleeves makes the shape of a bat.
The choker was therefore essential to get the batwing in my cosplay.
The main piece is just black cotton, stitched together and turned inside out so that there were no hems visible, joined at the back with hooks and eyes. I used lace and rhinestones to do the detailing, and crocheted some ‘chains’ for the big red beads that form the bat’s eyes. It may not be as perfect as the art, but if you look you can see the bat.
So that was the outfit - I managed to find a suitable skirt and some makeup (I opted to go for the civilized version rather than run around all day with fake blood all over my face)
Having spent quite a bit of time on the costume, I didn’t do very well in the tournament but I had a blast. Heres a link to the bigger versions of the card art if you’d like to admire them a bit more. Heir of Falkenrath Heir to the Night And big thanks to the artist Jason Rainville as well as all the other Magic cosplayers who inspired me to give it a go.
Heir of Falkenrath Gatherer Link
So, where to start? Firstly I took a look at a larger sized image of the card art (the artist is Jason Rainville, by the way). In a way I’m lucky that this card has two images to work from as the two angles give me more of an idea of how the dress would be constructed.
Obviously it’s strapless, and looking at the second image you can see that the sleeves are actually completely separate, not like some dresses you would get that have the sleeves connect to the bodice without having fabric on the shoulders. So I decided that the easiest way to create that for an amateur like myself would be to buy a corset and decorate that, making the accessories.
Bodice decoration
Most corsets are not just laced up the back, but also have a fastening up the front formed from a pair of metal strips that hook together (a busk). This means that you can get the corset on and off easily without having to completely unlace the back or pull it over your head. Obviously the character’s dress has embroidery all the way across the front so I would need to hide the busk but also make it easy to get on and off so I made a false front decorated with a piece of bridal lace, which I attached to the corset with Velcro. My thought at the time was that I would be able to wear the corset at other times as well, but so far I’ve only worn it as part of the costume.
I had to make a couple of test pieces out of scrap fabric as well as a paper pattern so that I could make it fit the curves of the corset properly. In the end I didn’t manage to centre the lace perfectly which does annoy me a bit but not enough to re-do it.
Sleeves
As I said earlier, the red sleeves are actually totally separate from the bodice. I wanted them to be nice and puffy so I gathered them at each end and added ribbon at the top to help them stay up and lace at the wrists for decoration. One of them does fall down more than the other but I think they are pretty effective.
Cloak
While the first image seems to show the cloak being attached across the vampire’s stomach with a jewelled chain, the second image has no sign of the chain and the cloak seems to be attached around the arms. I decided for reasons of practicality that I would attach the cloak around my sleeves with velcroed ribbon so that my arms would be fairly free to move about and so that I could put on and take off the costume unaided. I found a few tutorials online for making a child’s bat-wing cloak, and I adapted a pattern. It’s basically a rectangle with some arcs cut out for the batwing shape, and I gathered the top edge slightly to shape it a little. As it was going across the back of my shoulder blades rather than over my shoulders, I could get away with a simple shape. I also attached two rings so that I could hook it to the back of the corset so that it didn’t droop at the back.
Choker
One of the key things about this character’s outfit that you might not notice at first, is that the ‘negative space’ between her choker, her neckline and her sleeves makes the shape of a bat.
The choker was therefore essential to get the batwing in my cosplay.
The main piece is just black cotton, stitched together and turned inside out so that there were no hems visible, joined at the back with hooks and eyes. I used lace and rhinestones to do the detailing, and crocheted some ‘chains’ for the big red beads that form the bat’s eyes. It may not be as perfect as the art, but if you look you can see the bat.
So that was the outfit - I managed to find a suitable skirt and some makeup (I opted to go for the civilized version rather than run around all day with fake blood all over my face)
Having spent quite a bit of time on the costume, I didn’t do very well in the tournament but I had a blast. Heres a link to the bigger versions of the card art if you’d like to admire them a bit more. Heir of Falkenrath Heir to the Night And big thanks to the artist Jason Rainville as well as all the other Magic cosplayers who inspired me to give it a go.
Friday, March 22, 2019
Dusting off the blog! Past crafts:crochet
I have been crafting recently, I just stopped blogging about it. Here’s some things that I’ve made with my crochet hook in the intervening time.
Amigurumi - I made a few little animals as presents for my nephew when he was born:
The patterns for these came from “Let’s Get Crafting” magazine who helpfully put all their patterns online too, so here’s the links if you want to try. The wool is double knit weight.
dolphin pig crocodile
and here’s a little red dragon that I made for myself by adapting the crocodile pattern.
Blankets - I’ve made a few blankets for my friends and their babies, the first one I made was a stripy red one for my friend’s twins.
Here’s a granny square blanket that I made for us to curl up with on the sofa:
This one is one that I started not knowing who it was for and then I finished it when I got pregnant. I actually made two to the same pattern but somehow they ended up slightly different sizes. My tension isn’t always consistent so I like blankets because it doesn’t matter if they end up slightly the wrong size! It look like its lots of different colours, but it’s actually only two, the green sparkly wool and the rest is multicoloured random-dyed wool. The pattern for this came from “Let’s Get Crafting” as well so here’s the link Filet Crochet Blanket
Here she is when she was tiny under the blanket. She uses it for her dolls pram these days.
Baby clothes - I got a book of crochet baby patterns, so I made a couple of things from it, but the sizing seemed to end up a bit too big (could be my tension again) so I didn’t make too many after that.
Jumper - this one is for my cousin’s baby, it’s made with random dyed wool so that it can be stripy without having lots of ends to sew in! I made the 3-6 months size but it fitted him till he was a year old. The pattern is quite clever so there is only a small amount of sewing up, the centre back plus a small bit around the arms.
Coat - I made this for my daughter but it turned out that the sleeves were too long once she grew into the rest of it, and since it’s made of chunky wool it’s difficult to turn up the sleeves, so she hasn’t worn it all that much.
Dress - this was for my friend’s little girl for her first birthday. The zigzag stripes took ages with all the increases and decreases but it looks good in the end.
Other things - There’s a few other bits and bobs that I’ve made in the past few years.
Tiger gloves - I made some tiger stripy gloves out of chunky wool for my D&D character. I got the pattern from The Crochet Crowd, who do lots of free patterns and video tutorials, though they are based in Canada so the wool they use is not always available here. Hungry Caterpillar - I made this as a toy for Grace before she was born. It was supposed to be about two feet long but ended up a lot bigger, I think I used wool that was heavier than the pattern intended. The original pattern is from a blog that doesn't seem to be active any more. If anyone wants the version I used, I have it written down somewhere so just drop me a comment.

Well I think that’s enough for now to cover the past six year of crocheting.
Amigurumi - I made a few little animals as presents for my nephew when he was born:
The patterns for these came from “Let’s Get Crafting” magazine who helpfully put all their patterns online too, so here’s the links if you want to try. The wool is double knit weight.
dolphin pig crocodile
and here’s a little red dragon that I made for myself by adapting the crocodile pattern.
Here’s a granny square blanket that I made for us to curl up with on the sofa:
This one is one that I started not knowing who it was for and then I finished it when I got pregnant. I actually made two to the same pattern but somehow they ended up slightly different sizes. My tension isn’t always consistent so I like blankets because it doesn’t matter if they end up slightly the wrong size! It look like its lots of different colours, but it’s actually only two, the green sparkly wool and the rest is multicoloured random-dyed wool. The pattern for this came from “Let’s Get Crafting” as well so here’s the link Filet Crochet Blanket
Here she is when she was tiny under the blanket. She uses it for her dolls pram these days.
Baby clothes - I got a book of crochet baby patterns, so I made a couple of things from it, but the sizing seemed to end up a bit too big (could be my tension again) so I didn’t make too many after that.
Jumper - this one is for my cousin’s baby, it’s made with random dyed wool so that it can be stripy without having lots of ends to sew in! I made the 3-6 months size but it fitted him till he was a year old. The pattern is quite clever so there is only a small amount of sewing up, the centre back plus a small bit around the arms.
Coat - I made this for my daughter but it turned out that the sleeves were too long once she grew into the rest of it, and since it’s made of chunky wool it’s difficult to turn up the sleeves, so she hasn’t worn it all that much.
Dress - this was for my friend’s little girl for her first birthday. The zigzag stripes took ages with all the increases and decreases but it looks good in the end.
Other things - There’s a few other bits and bobs that I’ve made in the past few years.
Tiger gloves - I made some tiger stripy gloves out of chunky wool for my D&D character. I got the pattern from The Crochet Crowd, who do lots of free patterns and video tutorials, though they are based in Canada so the wool they use is not always available here. Hungry Caterpillar - I made this as a toy for Grace before she was born. It was supposed to be about two feet long but ended up a lot bigger, I think I used wool that was heavier than the pattern intended. The original pattern is from a blog that doesn't seem to be active any more. If anyone wants the version I used, I have it written down somewhere so just drop me a comment.

Well I think that’s enough for now to cover the past six year of crocheting.
Wednesday, October 10, 2012
Marzipan learns crochet
I have a friend who teaches children to crochet in schools, and one day I was at her house chatting about wool whith her and another friend (as you do) when I said I wanted to learn crochet. She gave us a quick lesson, but I didn't quite get the hang of it, and then she went away for summer holidays...
A few weeks later she came around to my house & taught me how to make chain (it's like finger knitting but with a hook) and slipstitches (to tie the bits of chain together). I made a ring, and a flower:
Then I got a bit carried away, and I tried to make a lacy mat-type thing with different colours of wool that I had:
I got quite into making chain while I was on the bus to work but I got a bit carried away:
Then I was in the crafty-shop one lunchtime, and I found some pretty wool to save me having to change colour all the time, and made a flower with it.
The trouble with that wool is that it's hard to see the stitches because it's so dark.
I got a bit bored of making chain after a while, but yesterday my friend taught me to make proper crochet (double crochet) in rows so now I have something else to do on the bus:
It's only about an inch wide as it's about eight stitches in a row. Any ideas for what to make with it? Or should I just try to make something more sensible & call this a practice piece?
| Ring and flower made of chain & slipstitches |
| Based on a flower, with chains around the edge | Except it looks a bit more like a hat than a mat. |
I got quite into making chain while I was on the bus to work but I got a bit carried away:
| This chain is longer than I am when it's stretched out. |
| Pretty firework wool! |
I got a bit bored of making chain after a while, but yesterday my friend taught me to make proper crochet (double crochet) in rows so now I have something else to do on the bus:
| A very tiny scarf? |
Monday, August 27, 2012
July/August 2012 - Hungry Caterpillar quilt
Several of my friends are expecting babies at the moment, but back in February I only knew about one of them. I happened to be in the crafty shop when I saw some Hungry Caterpillar fabric.
(It's made by Andover Fabrics, they have a couple of free patterns featuring the hungry caterpillar fabrics on their site also)
I'm a big fan of the hungry caterpillar, so obviously, I wanted an excuse to buy this fabric and make something out of it, so I decided to make a quilt for the new baby.
So I bought the fabric and kept it in my fabric box for a few months as I got distracted with other things. Finally in July I dug it out, measured it and went to buy backing fabric and wadding so that I could actually make it into something.
As it's one printed piece rather than a patchwork quilt, it's not as big as a bed quilt (it's about 70cm x 120cm) but it's still bigger than anything I've done before, so I consulted the internet for useful information and found some tutorials at Ludlow Quilt & Sew which I found quite useful (I just happened to find them through google, I know nothing about them other than their website.)
I decided to not be too complicated, and just outline the main motifs & white panels, and sew around the edge.
First of all I made up a practice piece to make sure I could follow the lines and quilt without making too much of a mess of the back, so I made up a little square about 25cm x 25cm of fabric and wadding that I had from other projects, and tried to quilt around all the flowers.
It didn't turn out too bad, the worst bit was where I tried to quilt all in one line so that I wouldn't have too many ends, which made the back look quite odd (I was using a contrasting thread so that I could tell what I was doing). This wouldn't be a problem in the actual quilt as it would mainly be straight lines & obviously I could just start & stop more often.
So I'd already washed and ironed the fabric for the main quilt, so I pinned the layers together & basted it (sewing it roughly together by hand so that the layers stay mainly in the right place), and I was ready to start.
Here it is after I'd quilted the butterfly:
So I carried on quilting the outlines. I had to sew in all the ends as
well so it took a few weeks working in the evenings (though it probably
would have been quicker if I hadn't decided to quilt around each segment
of the caterpillar!)
The last part was the leaf, and I happened to be quilting it on the
evening the Olympics started, and I wanted to watch the opening ceremony
at the same time as sewing so I moved my sewing machine in front of the
TV (the table it sits on has wheels as it's actually a computer desk).
This is the advantage of not having an electric sewing machine, I don't
need to be next to the wall socket the whole time.
I managed to finish the outline of the leaf reasonably quickly with the olympics to help me, so I somewhat foolishly decided to do some more quilting on the dotty background. I quilted diagonal lines about an inch apart across all the background, which took longer than you might think. (My sewing machine has a foot with a guide so that I can sew parallel lines so at least I didn't need to draw lines across my fabric). Originally I was going to do the diagonals both ways but as it looked fine with just one way diagonals, I decided to stop.
Once I'd trimmed the excess wadding and neatened the edges,the final step was to attach the binding. Again I consulted the useful tutorials from Ludlow Quilt & Sew and I managed to have enough of my backing material left over to make binding for all around the quilt. (Next time I must remember to allow for that when I buy the fabric!)
Here are some close ups of the binding on the finished quilt:
Despite using white cotton for the top thread of the quilting, I managed to use nearly a whole reel of green cotton!
And here's a video of Eric Carle reading the book for you!
(It's made by Andover Fabrics, they have a couple of free patterns featuring the hungry caterpillar fabrics on their site also)
I'm a big fan of the hungry caterpillar, so obviously, I wanted an excuse to buy this fabric and make something out of it, so I decided to make a quilt for the new baby.
So I bought the fabric and kept it in my fabric box for a few months as I got distracted with other things. Finally in July I dug it out, measured it and went to buy backing fabric and wadding so that I could actually make it into something.
As it's one printed piece rather than a patchwork quilt, it's not as big as a bed quilt (it's about 70cm x 120cm) but it's still bigger than anything I've done before, so I consulted the internet for useful information and found some tutorials at Ludlow Quilt & Sew which I found quite useful (I just happened to find them through google, I know nothing about them other than their website.)
I decided to not be too complicated, and just outline the main motifs & white panels, and sew around the edge.
First of all I made up a practice piece to make sure I could follow the lines and quilt without making too much of a mess of the back, so I made up a little square about 25cm x 25cm of fabric and wadding that I had from other projects, and tried to quilt around all the flowers.
It didn't turn out too bad, the worst bit was where I tried to quilt all in one line so that I wouldn't have too many ends, which made the back look quite odd (I was using a contrasting thread so that I could tell what I was doing). This wouldn't be a problem in the actual quilt as it would mainly be straight lines & obviously I could just start & stop more often.
| Patterned side of practice piece | Backing side of practice piece |
So I'd already washed and ironed the fabric for the main quilt, so I pinned the layers together & basted it (sewing it roughly together by hand so that the layers stay mainly in the right place), and I was ready to start.
Here it is after I'd quilted the butterfly:
![]() |
| Close-up of quilting lines and basting |
| Panel of leaf & tiny caterpillar |
| Beautiful butterfly! |
| The Very Hungry Caterpillar has not yet eaten any holes in the quilt! |
| Back of almost-finished quilt showing quilt lines |
I managed to finish the outline of the leaf reasonably quickly with the olympics to help me, so I somewhat foolishly decided to do some more quilting on the dotty background. I quilted diagonal lines about an inch apart across all the background, which took longer than you might think. (My sewing machine has a foot with a guide so that I can sew parallel lines so at least I didn't need to draw lines across my fabric). Originally I was going to do the diagonals both ways but as it looked fine with just one way diagonals, I decided to stop.
Once I'd trimmed the excess wadding and neatened the edges,the final step was to attach the binding. Again I consulted the useful tutorials from Ludlow Quilt & Sew and I managed to have enough of my backing material left over to make binding for all around the quilt. (Next time I must remember to allow for that when I buy the fabric!)
Here are some close ups of the binding on the finished quilt:
| Binding on front of quilt | Binding on back of quilt showing slipstitches |
| I only have a little bit of cotton left! |
| Final finished quilt of beauty |
Monday, August 6, 2012
Patchwork Owl - March 2012
I've been making things lately, but I keep forgetting to blog about them so stand by for a few posts in a row.
Partly that was because I was making things as presents so I didn't post about them before i gave the present, and then I forgot all about it!
So in March it was my mum's birthday. I decided to make her a cake which you can read about here, and as a present I made her a patchwork owl as she runs a Brownie pack so she is a 'Brown Owl'.
The pattern was quite simple as the owl is symmetrical, the main problem I had was hemming the beak & eyes (you might be able to tell from the picture they're a bit frayed especially at the corner of the beak)
Anyway my mum loves it so that's the main thing!
Partly that was because I was making things as presents so I didn't post about them before i gave the present, and then I forgot all about it!
So in March it was my mum's birthday. I decided to make her a cake which you can read about here, and as a present I made her a patchwork owl as she runs a Brownie pack so she is a 'Brown Owl'.
| Patchwork owl sitting on the sofa! |
Anyway my mum loves it so that's the main thing!
Thursday, March 22, 2012
Purple bag - 22/3/12
It's been a while since I did any sewing, but I've had the fabric for this bag half cut out for about a month so yesterday I decided to sew it together.
It's made of three different fabrics, but you could use just two or even one. Here it is finished:
This bag's finished size is 29cm x 32cm, so it's just big enough to fit an A4-sized magazine. The handles are stiffenned with some iron-on interfacing (which I managed not to stick to the iron or the ironing board) but the bag itself is just made of cotton fabric. Hopefully I won't break it too soon!
It's made of three different fabrics, but you could use just two or even one. Here it is finished:
| Finished bag | Showing the lining |
Subscribe to:
Posts (Atom)